We worked in the attic first. First, we cut out the space where range hood was going to fit. Then We cut out the beam that was going to be on our way, then installed two new beams that would also support the range hood. But there was no head space at where we had to work at, so we had to be on our stomach the whole time to get this done.

There were bunch of glass wools exposed everywhere. So I placed some pieces of plywood to cover them up and got on the plywood and started working, but using the hand saw whole being on your stomach was not fun at all.
As soon as I was done with cutting, then I started installing the 2 x 6s which will support the range hood. The place was so narrow with existing chimney there. We could not even use drill driver to get the screws in. So I had to tighten all the screws with my hand tool only, while lying on my stomach still. I was so sick of being in this position.

Finally finished this miserable work. The 2 pieces of wood yon can see are the new beams.
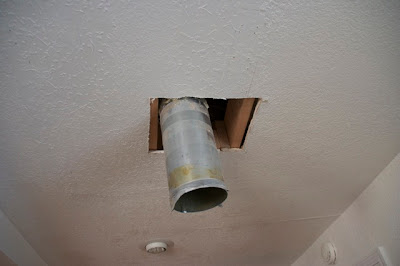
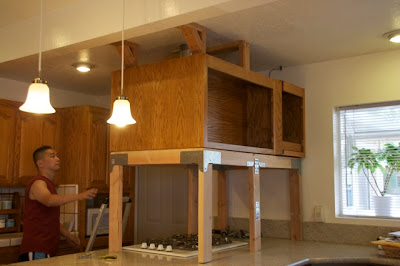
Then we had to cut out part of the chimney and joint with the flexible one to it would go into the new range hood properly. Then we placed support frame. Again, there was not enough space in the support frame to use power tools, so we had to screw in 4 big screws to mount the support frame to the beams we just installed. It was really, really hard.
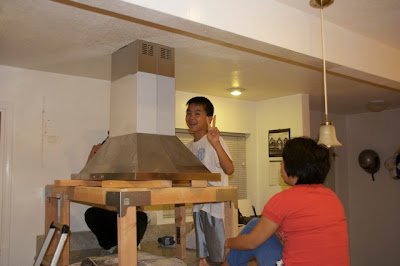
By then, we started driving kids to help us out. Somebody had to hold the support frame still while at least 2 screws are placed to mount the support frame. It was heavier than it looks. This process felt like endless process.
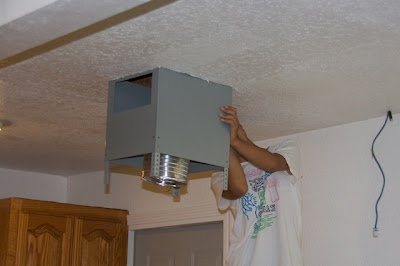
Then we added lower support frame.

We stared to work on installing the chimney cover, and started wiring range hood. The boys still had energy left, but my wife and I were totally exhausted,
We had more screws to go, but it was well past 7:00pm. so we went out to get something to eat, We resumed the work around 8:00pm.
At 9:30pm:
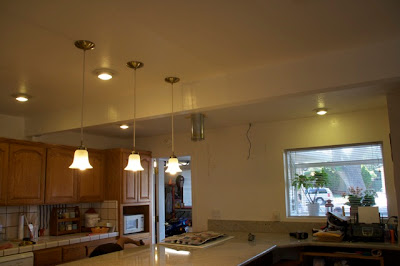
We are DONE!!!

I was so worked up that I just could not fall asleep.
Glad it's over now.

I like working DIY stuff since was a low teen,But this was the most challenging work ever.
But, hey, it looks really cool. I am glad we did it.